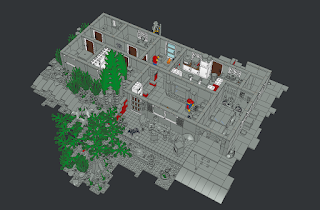
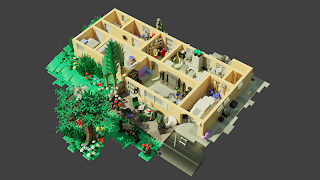
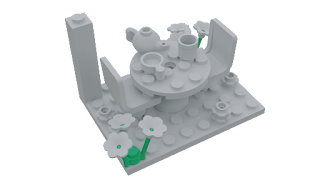
I've recently made my very first own Original LEGO design: South African Stream House. Some parts of the work process were a little tricky to figure out, so this article we be a summary of what I learned. You basically want to turn your LEGO models from looking like this in LeoCAD:
...to looking like this in Blender:
Let's get started. This article assumes you have some basic Blender skillz. If you don't, I think this guy's tutorials on YouTube are good: Grant Abbitt. You basically just need the following: how to navigate around Blender, how to scale objects, how to add and modify materials by using nodes, how to render out the scene to an image.
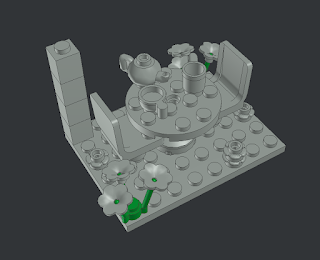
To experiment we are going to use this basic scene I made in LeoCAD :
Lesson 1. Save often when using LeoCAD because it crashes often.
Lesson 2. When exporting from LeoCAD to Blender, use COLLADA, which ends with *.dae. The reason is that then the LEGO bricks will be separated when importing the file into Blender.
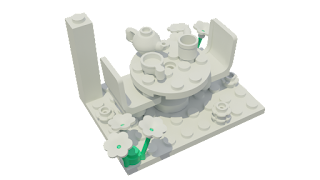
Lesson 3. After importing the LEGO bricks into Blender, they are very small. So you should make sure they have the scale of roughly 0.018. You can easily do this by selecting all objects, press S, and then 45, and they should have a scale of 0.018. Now it should look like this in Blender:
I'm using Cycles renderer (which you will learn soon why you have to) with 128 samples, Adaptive Sampling set to on, and OptiX denoising.
Lesson 4. Use an environment texture. You set this in the Shader Editor and then you select world. There's a node called Environment Texture, and then you pick one of your choice. You can find some here: Poly Haven. I'm using a cloudy one, which is recommended if you want a neutral scene. The strength is set to 2.
Lesson 5. Add a light called sun to get shadows. I gave it a yellowish color and strength 5, and I rotated it so it's not just top-down.
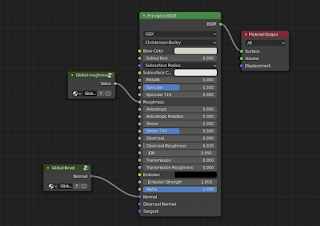
Lesson 6.1. When adding color parameters, use global values. All LEGO pieces are made of the same plastic material, so you want all materials to have the same settings - except for color. If make a change in one material, you want it to affect all other materials as well. To accomplish this you can use node groups. So create one material called like "Green," with a Value node connected to roughness. The value should be set to like 0.2. To make the roughness value global (so if you change it in one material, then all materials get the same roughness) you click on the node and press Ctrl + G. You should also name the node group to something clever like "Global roughness."
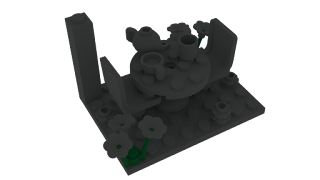
Lesson 6.2. If you observe the image above you can see that it looks like the 4 bricks in the corner are one brick. The reason is that real LEGO pieces have a slight bevel to them. To create this bevel you can use a node called Bevel which you connect to the Normal input in the Principled BSDF. Blender will now create a bevel to each edge when rendering the image. This only works in Cycles. If you want to export the LEGO to some game engine like Unity you have to come up with some other way, like scaling each LEGO brick so they don't have the exact same size. This Bevel node should also be in a node group if you want to experiment with settings. I'm using a Bevel radius of 0.025. When creating the Bevel node group, it is very important to not connect the Bevel node to any Group Input, or the values will NOT be global. The input connections are automatically created when you create the node group, so remove those! The material should now look like this:
Now if you give all pieces their own color, then the scene should look like this:
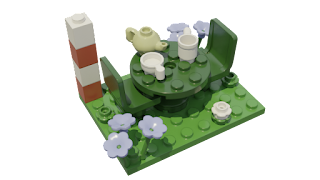
Lesson 7. Add Ambient Occlusion. You can see that the image looks kinda bland. To make details pop out more you can add ambient occlusion, which is basically just shadows. You can do this in two ways: add an ambient occlusion node and multiply it with the color node, or by using post processing. The latter alternative is faster and produces a similar result, so I recommend it. This is a good tutorial on how to add it as a post processing effect: Blender | Ambient Occlusion Passes | Getting Started. You can see that for example the inside of the cup is now darker!

Win!
…and if you want to make even more realistic LEGO, you should study these articles:
…which I've implemented and you can download the Blender project here: Blender LEGO material where you can see this guy:

If you are going to use the above material in your own projects, make sure you apply the scale of each object, so scale should be 1!
A video of this would be extremely helpful
ReplyDeletethanks!
ReplyDelete