What we are going to achieve here is this:

Unity3D tank tutorial Part 1
Unity3D tank tutorial Part 2
Unity3D tank tutorial Part 1 (translated)
Unity3D tank tutorial Part 2 (translated)
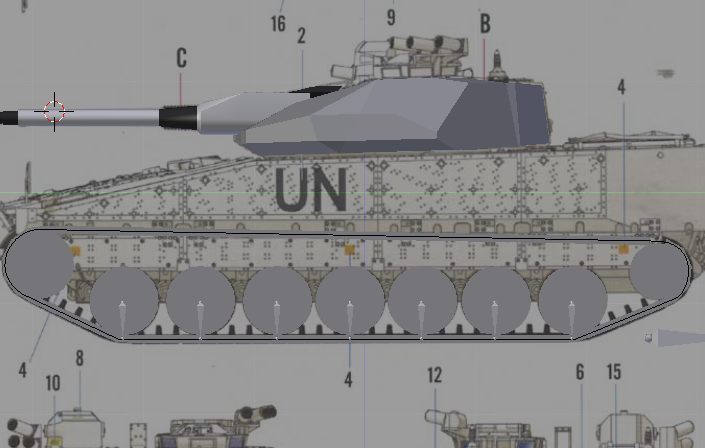
Step 1. Import your blueprints and model something that looks like a tank.

Step 2. Draw a curve that symbolizes the track.


Step 5. Connect the bones to the track and assign vertex groups to each bone.


How do we make tank tracks in Blender and Unity? One part of the problem has already been answered in a Russian tutorial, but you can translate it with Google translate, or follow the links below.
Unity3D tank tutorial Part 1
Unity3D tank tutorial Part 2
Unity3D tank tutorial Part 1 (translated)
Unity3D tank tutorial Part 2 (translated)
In the Russian tutorial you will learn how to import a tank model in Unity and how to make it move. I don't know if it's the ultimate solution, but it's a good starting point. It uses the simplified version of tank tracks - a solid mesh that symbolizes the track and then the texture is animated so it looks like the track is moving. The other version, to model each part of the track and then join them together, will produce a more realistic track, but your computer will probably burn up from the calculations.
The problem with the Russian tutorial is that it assumes we know how to make the track itself. Well, I didn't and it took a while to figure out, and I thought it would be a good idea to share my new knowledge. We are going to use Blender to make a tank track that fit the Russian tutorial - and we are going to do it with bones. It is assumed that you have some knowledge of Blender.
Step 1. Import your blueprints and model something that looks like a tank.
Step 2. Draw a curve that symbolizes the track.
Step 3. Draw one cube (the size of the cube will determine the resolution of the track) that will be modified with two modifiers. The first modifier is an array modifier and the other is a curve modifier. The cube will now look like a track but is not connected so before you move on you have to connect the track so it becomes one solid shape.
Step 4. Add bones to the track and position them so they originate from the center of the wheel to make it easier to move them in Unity. You also need to add a "surplus" bone where we are going to assign the vertices that don't belong to anywhere else.
Step 5. Connect the bones to the track and assign vertex groups to each bone.
Step 6. Weight paint the vertex groups so that the outer vertices are not moving as much as the vertices that are closer to the center of the wheel. It's important that each vertices has a total weight of 1. So the vertices connected to the left/right of the "outer" wheels have also to be connected to the "surplus" bone that we added before, or Blender will automatically give them weights of 1 and it will mess up the simulation.
Step 7. Mirror everything, export to Unity, use what you've learned in the Russian tutorial, and the result will hopefully look like this:
Thanks for this article, this is exactly what I have been working on for the last few days. The issue I have is setting up the vertex weights in blender to achieve a nice smooth bend on the track under each wheel. Could you possibly please share the blender file so I can see how you set up these vertices and bones?
ReplyDeletehttps://www.youtube.com/watch?v=Wq7gTaTZ-yk
DeleteSo the line lp.y -= Vector3.Dot(w.position - hit.point, transform.up) - wheelRadius; and the other one in the else block don't function for me. The wheels and the track scatter all over the place. Thoughts?
ReplyDelete4 years late, but did you find a solution for this?
DeleteThis comment has been removed by the author.
ReplyDeleteCan you make this tutorial on yutube?
ReplyDeleteThat would helpfull